Building a Video Streaming Service with AWS S3, CloudFront, NodeJS, and React
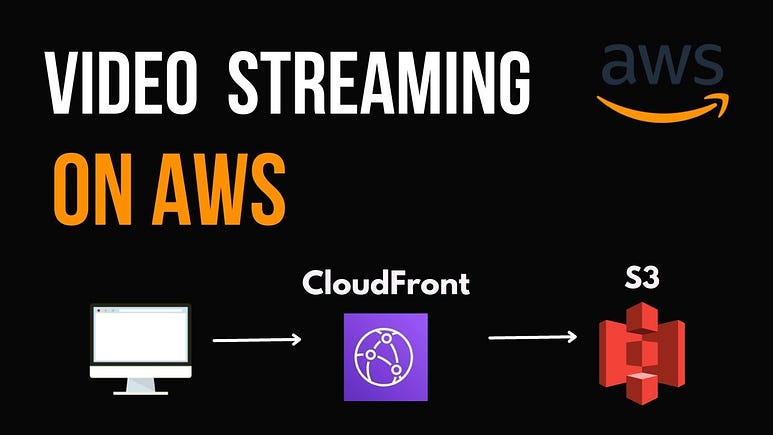
Suppose you’re tired of the limitations of existing video streaming platforms because you’re broke and decide to create your own — fully customized, scalable, and lightning-fast. Sounds crazy, right? Well, with AWS S3, CloudFront, NodeJS, and React, it’s not only possible but also easier than you think.
Today, I’ll walk you through the exact steps to build a video streaming service that can handle high traffic, serve videos globally, and scale effortlessly. Ready? Let’s jump right in!

Why Build a Video Streaming Service?
Before we dive into the technical details, let’s take a step back. Why would you want to build your own video streaming service?
Customization: You control everything — no third-party platform dictating what you can or cannot do.
Scalability: With AWS services like S3 and CloudFront, you can handle millions of users without breaking a sweat.
Cost Efficiency: Pay for exactly what you use. No over-the-top subscription fees for extra features you might not need.
Okay, now that we’ve covered the “why,” let’s get into the “how.”
Setting the Stage: What You’ll Need
Here’s a quick rundown of the tools and services we’ll be using to bring this streaming service to life:
AWS S3: For storing video files.
AWS CloudFront: For fast content delivery through a CDN.
NodeJS: Our backend server to serve videos dynamically.
React: The frontend for a user-friendly interface.
Step 1: Storing Videos in AWS S3
First things first, we need a place to store our videos. Enter AWS S3 (Simple Storage Service) — the perfect solution for secure, scalable, and high-availability storage. Here’s how you can set it up:
Create an S3 Bucket
Head over to the AWS Management Console.
Search for S3 in the search bar and click on it.
Create a new bucket, give it a name (e.g.,
my-videos-bucket), and choose a region.Make sure the bucket has public read access for CloudFront to serve content. We’ll handle security with CloudFront’s signed URLs later.
AWS S3 Bucket Policy
Now, we need to define a policy for our S3 bucket to allow CloudFront access. Here’s a sample policy you can use:
{
    "Version": "2012-10-17",
    "Statement": [
        {
            "Effect": "Allow",
            "Principal": "*",
            "Action": "s3:GetObject",
            "Resource": "arn:aws:s3:::my-videos-bucket/*" //insert your bucket name here instead of "my-videos-bucket"
        }
    ]
}
This policy allows the world to read objects in your bucket, which is necessary for CloudFront to serve the video files. However, we’ll add a layer of security by integrating signed URLs in CloudFront to control who can access the content.
Step 2: Delivering Videos with CloudFront
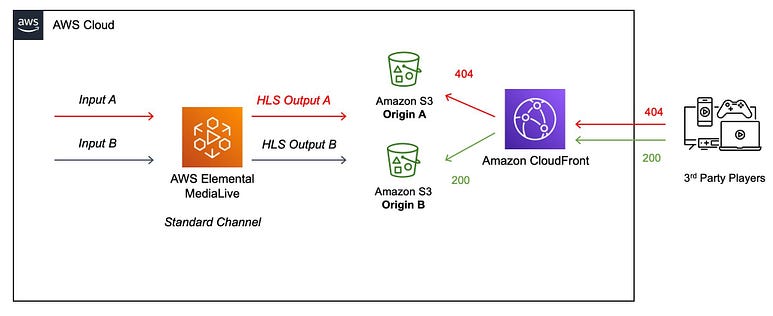
Now that your videos are stored in S3, we need to deliver them quickly and efficiently. That’s where AWS CloudFront comes in. CloudFront is a content delivery network (CDN) that ensures your videos load fast no matter where your users are in the world.

Set Up CloudFront Distribution
Go to the AWS Management Console and search for CloudFront.
Click on Create Distribution.
Choose Web as the delivery method.
In the Origin Settings, set your Origin Domain Name as your S3 bucket (e.g.,
my-videos-bucket.s3.amazonaws.com).Enable Signed URLs for security (we’ll discuss this more in a bit).
Finish creating the distribution.
Generating Signed URLs for Secure Access
We don’t want just anyone to be able to access our video files, right? That’s why we use signed URLs. This way, only users with a valid signed URL can access your content. Here’s how you can implement this in NodeJS.
Step 3: Setting Up the Backend with NodeJS
To control access to your videos, we need a backend server that will generate signed URLs. Let’s set up a basic NodeJS server for this.
Install Dependencies
First, make sure you have NodeJS installed. Then, in your project directory, install the necessary packages:
npm init -y
npm install express aws-sdk
Backend Code to Generate Signed URLs
Here’s a simple NodeJS server that generates signed URLs for CloudFront:
const express = require('express');
const AWS = require('aws-sdk');
const app = express();
const port = 3000;
// Configure CloudFront signing key
const cloudFront = new AWS.CloudFront.Signer('your-key-id', 'your-private-key.pem');
// Generate signed URL
function generateSignedUrl(url) {
    const expires = Math.floor((Date.now() + 60 * 60 * 1000) / 1000); // 1 hour expiry
    return cloudFront.getSignedUrl({
        url: url,
        expires: expires,
    });
}
app.get('/video', (req, res) => {
    const videoUrl = 'https://your-cloudfront-url/video.mp4';
    const signedUrl = generateSignedUrl(videoUrl);
    res.json({ url: signedUrl });
});
app.listen(port, () => {
    console.log(`Server running on port ${port}`);
});
This code creates a simple Express server that generates a signed URL for a video stored in CloudFront. When a user hits the /video route, they’ll get a signed URL, allowing them to stream the video.
Step 4: Building the Frontend with React
Now, let’s set up a clean, user-friendly interface for the video streaming service using React.
Install React
First, create a new React project:
npx create-react-app video-streaming-frontend
cd video-streaming-frontend
Fetching and Displaying the Video
Here’s how you can fetch the signed URL from your NodeJS backend and display the video:
import React, { useState, useEffect } from 'react';

function App() {
  const [videoUrl, setVideoUrl] = useState('');
  useEffect(() => {
    // Fetch the signed URL
    fetch('/video')
      .then(response => response.json())
      .then(data => setVideoUrl(data.url))
      .catch(error => console.error('Error fetching video URL:', error));
  }, []);
  return (
    <div className="App">
      <h1>Video Streaming Service</h1>
      {videoUrl ? (
        <video width="600" controls>
          <source src={videoUrl} type="video/mp4" />
        </video>
      ) : (
        <p>Loading video...</p>
      )}
    </div>
  );
}
export default App;
This simple React app fetches the signed video URL from the backend and displays it in an HTML <video> tag. And just like that, you have a working video streaming frontend!
Step 5: Testing and Scaling Your Service
With everything set up, you can now test your video streaming service locally or on a server. But what about scaling?
Auto-scaling on AWS: Both S3 and CloudFront automatically scale based on traffic. As your user base grows, your streaming service will be able to handle the load seamlessly.
Edge Locations: CloudFront distributes your videos across global edge locations, meaning your content is delivered quickly to users, no matter their location.
Further Improvements: Optimizing Your Video Streaming Service
Now that you have a basic video streaming service up and running, let’s talk about optimizations and advanced features that can improve the user experience and overall performance of your service. These features include adaptive streaming, video transcoding into multiple resolutions, and the use of AWS Lambda for efficient processing.
1. Adaptive Bitrate Streaming with HLS and FFmpeg
To provide a seamless viewing experience across different devices and network speeds, you can implement HTTP Live Streaming (HLS). HLS is a protocol that breaks video files into smaller chunks and delivers different quality streams (e.g., 144p, 360p, 720p, 1080p), allowing the video player to dynamically switch between them based on the user’s internet speed.
To create HLS streams, you can use FFmpeg, a powerful multimedia processing tool. FFmpeg allows you to convert video files into multiple resolutions and create the playlist files necessary for HLS.
Here’s a basic command to convert a video into multiple resolutions using FFmpeg:
ffmpeg -i input.mp4 \
  -vf "scale=1920:1080" -c:v libx264 -preset slow -crf 22 -c:a aac -strict -2 -b:a 192k output_1080p.m3u8 \
  -vf "scale=1280:720" -c:v libx264 -preset slow -crf 22 -c:a aac -strict -2 -b:a 128k output_720p.m3u8 \
  -vf "scale=640:360" -c:v libx264 -preset slow -crf 22 -c:a aac -strict -2 -b:a 96k output_360p.m3u8 \
  -vf "scale=426:240" -c:v libx264 -preset slow -crf 22 -c:a aac -strict -2 -b:a 64k output_240p.m3u8
This command converts a single video file into multiple streams at different resolutions and bitrates. You can also create an HLS playlist (master.m3u8) that references these different resolution streams.

2. Transcoding with AWS Elastic Transcoder or AWS MediaConvert
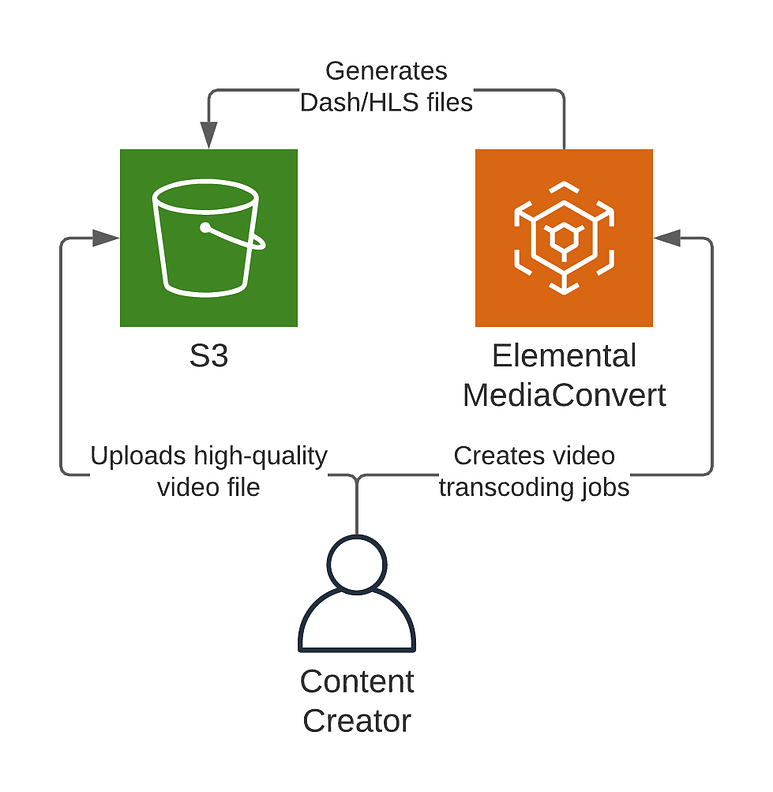
Another way to automate the process of creating multiple video resolutions is by using AWS Elastic Transcoder or AWS MediaConvert. These services are designed to convert media files stored in S3 into different formats and resolutions. They also support HLS out of the box.
AWS Elastic Transcoder: A service designed specifically for transcoding media files, allowing you to create multiple output formats for various devices.
AWS MediaConvert: A more advanced solution for large-scale media transcoding, supporting adaptive bitrate streaming and HLS workflows.
You can set up a transcoding pipeline in Elastic Transcoder or MediaConvert to automatically convert any uploaded video into multiple resolutions, making your service more scalable and efficient.

3. Dynamic Resolution Switching Based on Network Speed
Once you have your videos transcoded into multiple resolutions using FFmpeg or AWS, the next step is to enable dynamic switching between these resolutions based on the user’s network speed.
With HLS streaming, most modern video players (e.g., video.js, React Player) automatically handle bitrate switching. These players monitor the user’s bandwidth in real-time and adjust the video quality to ensure smooth playback. You can integrate one of these players in your React frontend to leverage this feature.
4. AWS Lambda for Serverless Video Processing
To further optimize and automate your workflow, you can use AWS Lambda to trigger video transcoding or processing whenever a video is uploaded to your S3 bucket.
For example:
Set up an S3 Event Trigger to invoke a Lambda function whenever a new video is uploaded.
The Lambda function can then initiate a transcoding job via Elastic Transcoder or MediaConvert to generate multiple resolutions.
This setup is fully serverless, meaning you don’t have to manage any infrastructure, and it automatically scales based on the number of uploads.
5. Optimizing for Mobile Users
If your target audience includes a large percentage of mobile users, optimizing video delivery is crucial. Consider the following:
Lower resolution formats: Ensure that lower resolutions like 144p and 240p are available for users on slow or limited data connections.
Mobile-friendly player: Integrate a responsive video player that works seamlessly across mobile devices.
6. Using AWS CloudWatch for Monitoring and Analytics
Finally, don’t forget about monitoring your system. AWS CloudWatch can be used to track metrics like request counts, error rates, and video delivery performance. You can set up custom CloudWatch alerts for when certain thresholds are met, ensuring your service runs smoothly at all times.
Adaptive Bitrate Streaming (HLS) with FFmpeg to provide a smooth viewing experience at varying network speeds.
Automatic Video Transcoding using AWS Elastic Transcoder or MediaConvert.
Dynamic Resolution Switching to adjust video quality based on the user’s connection.
AWS Lambda for serverless video processing triggered by S3 uploads.
Mobile Optimization for better performance on mobile networks and devices.
Monitoring with AWS CloudWatch to track system performance and usage.
By incorporating these improvements, you’ll create a more robust, scalable, and user-friendly video streaming platform.
Final Thoughts
Building a video streaming service might sound daunting, but with the right tools — AWS S3, CloudFront, NodeJS, and React — it becomes a manageable and rewarding project. You’ll have complete control over the user experience, content delivery, and even security.
So, what are you waiting for? Start building, and let the world stream your content!
Ready to take the next step? Share your experience or ask questions in the comments below. Let’s get your streaming service up and running!